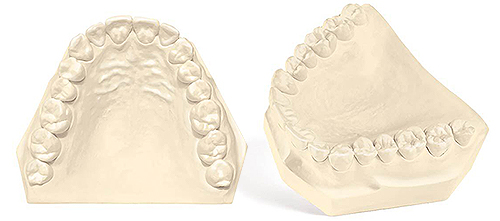
To achieve the ideal Gypsum mix and create a smooth, bubble-free model, follow the guidelines below.
Preparation
Ensure that your equipment is clean and free from residue before mixing the gypsum. Any residue may have a negative effect on the setting time and expansion of the mixture. Mix your gypsum to the exact water/powder ratio and under vacuum, if possible, for best results.
Water to Powder Ratios
The water to powder ratio for each product is given in milliliters (ml) or cubic centimeters (cc) water to 100 grams (g) of powder. It is recommended to use room temperature distilled water (i.e. do not use water from the model trimmer or gypsum hardener liquids).
Water to Powder Ratios
[ultimatetables 1 /]
Mixing the Gypsum
Place water in the bowl first, then add the correct amount of powder to the water slowly and evenly. We recommend that the water is completely incorporated prior to hand or mechanical mixing.
Hand Mixing
Hand mix using back-and-forth strokes with a spatula, occasionally turning the bowl and scraping down the sides to incorporate all dry and unmixed material. Do this until a creamy homogeneous mix is achieved. Usually, 45-60 seconds is adequate.
Vacuum Mixing
Mechanical mixing accelerates the working and setting time of Dental Stones and Plasters. Because mechanical mixers are faster, place powder into the water and stir by hand for approximately 5 seconds until all powder is wet, then start your mechanical mixer. Mix for a shorter time, approximately 10 to 15 seconds, then hand mix to check for a homogeneous mix. DO NOT OVER MIX.
Mixing Tips
Mixing too long will begin to break down initial particle bonding. Mixing too little will not allow all particles to sufficiently hydrate, thus inhibiting bond of some particles, creating dry pockets of gypsum material.
Mixes can be made thicker or thinner by changing the recommended water plus or minus 1 ml without significantly changing properties, plus/minus 1 ml is the maximum adjustment recommended.
Pouring the Impression
After mixing, the impression should be immediately poured within the working time of the gypsum. The gypsum begins to crystallize at the end of the working stage and will no longer be able to capture fine details. Vibration should be completed before the setting stage. Note: Hydrocolloid and Alginate impressions should be poured with gypsum immediately after cleaning, disinfecting, and neutralizing because they are not volumetrically stable.
A water-based surfactant may be used as a debubblizer but is not necessary. Simply rinse impression with water and shake to remove excess water. (Note: Too much water remaining in impression will weaken outer layer of model and will appear chalky.)
Initial Set Time
The initial set time listed in minutes is a standard vicat test. Actual working time will be approximately 2-4 minutes less than the initial setting time. Some gypsums have a “gradual set” working time such as Veri-Die but most have a “snap set” (i.e. Excalibur Tecstone, Apex, Labstone) which gives a longer working time and sets up fast in the end.
When the surface of the stone loses its shine (loss of gloss), it can still be shaped for approximately 1 minute before the set time begins. At this point, no further work can be done, as this would affect crystallization.
Gypsum Set Time
[ultimatetables 2 /]
Removing the Model
In general, the set model must not be removed from the impression for 3 times the set time. For example, Tecstone has a 13-15 minute set time, so we would recommend that it would be safe to remove the model after approximately 45 minutes. Cast models can be removed from impressions when the exotherm is completed. This can generally be determined by touch, i.e. when the heat generated after the initial set has subsided.
Packaging and Storage
Once a package is opened, the material is exposed to moisture and proper storage is required. Dental gypsum products are very hygroscopic, therefore it is important to reseal the plastic bag and store it in a dry space at room temperature when not in use.
Cleaning and Caution
It is important that mixing bowls and other mixing equipment for dental gypsum be used only for mixing dental gypsum. Other materials such as phosphate investment or impression materials mixed in the same equipment will seriously contaminate and change the properties of the dental stones.
Also, be sure to clean all mixing equipment when you are finished and that no dry gypsum remains in the bowl or on your spatula.
More Information
All Garreco dental gypsum products are batch controlled and tested. Only the finest raw materials are selected and used. This produces a consistent quality necessary for accurate dental restorations. If you have any questions, please contact us at 800-334-1443 x234 or by e-mail support@garreco.com.

